


With the help of Entriwise and our guide below, you’ll be able integrate your sales data in Quickbooks accurately and efficiently.
One of the first things you learn in accounting is that you need to reconcile your checking and credit card accounts to ensure that the transactions that make up your financial statements are accurate and up-to-date. This process involved matching the transactions on your checking or credit card statement with the transactions within your chart of accounts within Quickbooks (or equivalent accounting software).
Unfortunately, when it comes to reconciling your sales data from Amazon, it is not as simple. This is mostly due to Amazon’s reserved balances, as well as how — and when — your revenue flows into your checking account.
You might have $50k in sales in one month and only show $30k in deposits from Amazon in your checking account. If this situation sounds familiar, it is because Amazon has a reserved balances where they hold a percentage of your revenue to protect them against any potential returns or refunds. They also don’t have a traditional bank statement, which makes reconciling your information rather difficult.
Lucky for you, we’re going to show you exactly how to import your Amazon sales data directly into Quickbooks using Entriwise, and how to reconcile this data to confirm it’s accuracy.
Why We Use Entriwise
Entriwise integrates your sales data into Quickbooks. With Entriwise, you’ll be able to easily categorize your sales data into revenue (sales price), refunds, fees (Amazon selling fees), and reimbursements.
The costs associated with selling on Amazon is not something to take lightly. For example, you might sell an item on Amazon for $40.00 but only receive $25.00 after all of Amazon’s fees. If this is the case for you, then it is important to understand the COGS (Cost of Goods Sold) associated with selling on Amazon by breaking down the $25.00 deposit in the example above as follows:
- Revenue: $40.00
- Cost of Goods Sold (Amazon Fees): $15.00
- Gross Profit: $25.00
By breakdown your sales transaction in this way, you’re better understand the cost associated with selling this item on Amazon vs another sales channel.
With Entriwise, you’ll be able to breakdown everyone of your transactions in this way without any of the manual work.
Now, we’ll explain how to properly set everything up!
Creating An Amazon Bank Account Within Your Quickbooks’ Chart of Account
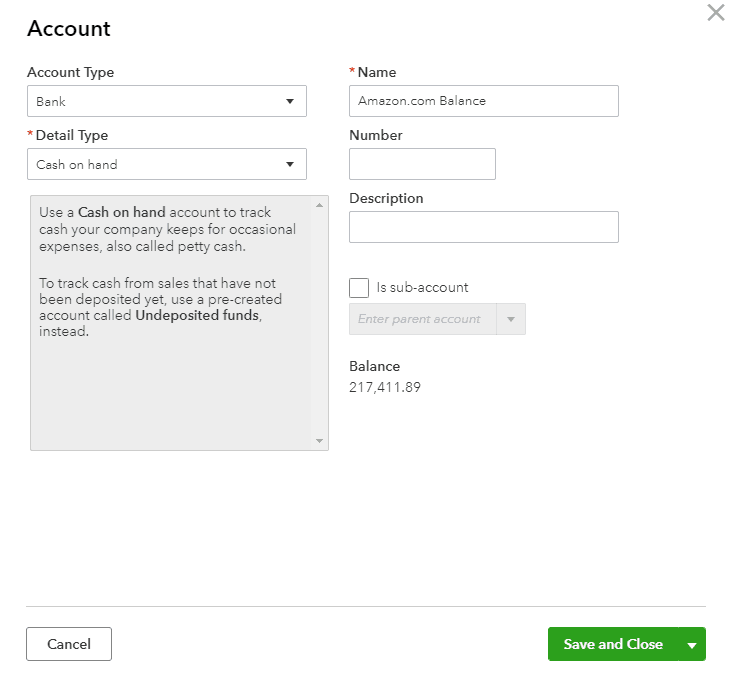
In order to properly import all of your sales data into Quickbooks, you’ll first need to create a bank account called ‘Amazon.com Balance’ — or any other similar title. Entriwise will import your Amazon sales data directly into this account.
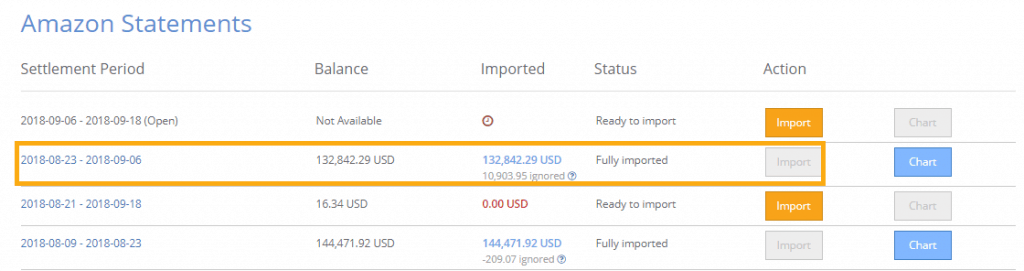
Understand Your Amazon Seller Central Statement View Report
This will be the report that we will use to reconcile your Amazon orders & fees once they are imported into your Amazon.com Balance account within Quickbooks.
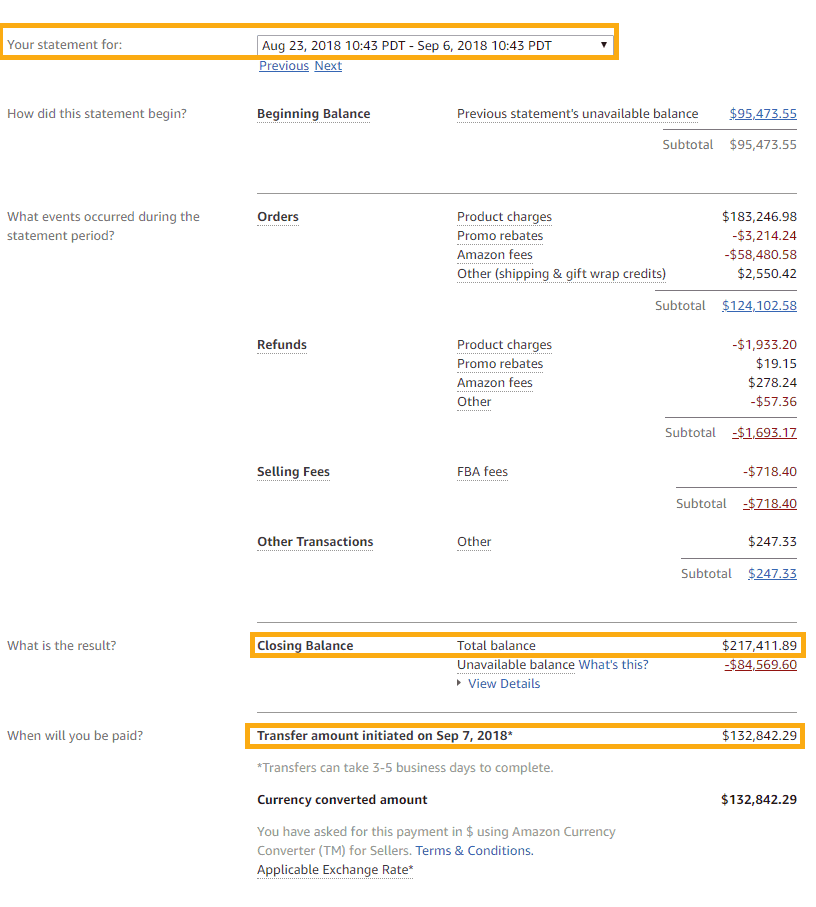
You can access this report within your Amazon Seller Central account by going to Reports > Payments > Statement View. Note the following:
- We are reconciling “Standard Orders” in this example.
- Statement Period: August 23rd, 2018 to September 6th, 2018.
- Period Ending Date: September 6th, 2018 will be the period ending date for your reconciliation within Quickbooks.
- Closing Balance: $217,411.89 is the closing balance that should be entered into your reconciliation with Quickbooks.
- Transfer Amount: This is the amount that is actually being transferred from Amazon (also your Amazon.com Balance Account) into your checking account during this period. Please take note of the transfer date.
- Unavailable Balance Amount: This amount Amazon holds for any chargeback issues. If you notice, unavailable balance ($84,569.60) is the difference between the closing balance ($217,411.89) and the transfer amount ($132,842.29). If you have no Unavailable Balance, Amazon will charge the refunds on the credit card you have on file.
Now that we understand the Statement View Report. We can go over the Entriwise in some more detail.
How To Organize Your Sales Data Within Entriwise
Entriwise is a program that is solely dedicate to reconciling and integrating your Amazon Sellers Central data into Quickbooks. The program aggregates your order information and separates it into the following categories: orders (revenue), refunds, fees, and reimbursements.
Product & Service Mapping
During the setup process you may choose between automatic or manual handling of all types of Amazon FBA and seller fulfilled transactions: orders, refunds, seller fees; FBA inbound, outbound, disposal fees; reimbursements, adjustments, etc.
If you choose automatic handling, then Entriwise will sync your sales data with their default chart of account choice for each type of transaction.
If you choose manual handling, then you can then you can change the mapping type as you please (ie, they might map an item to a expense account and you might want the item mapped to a COGS account).
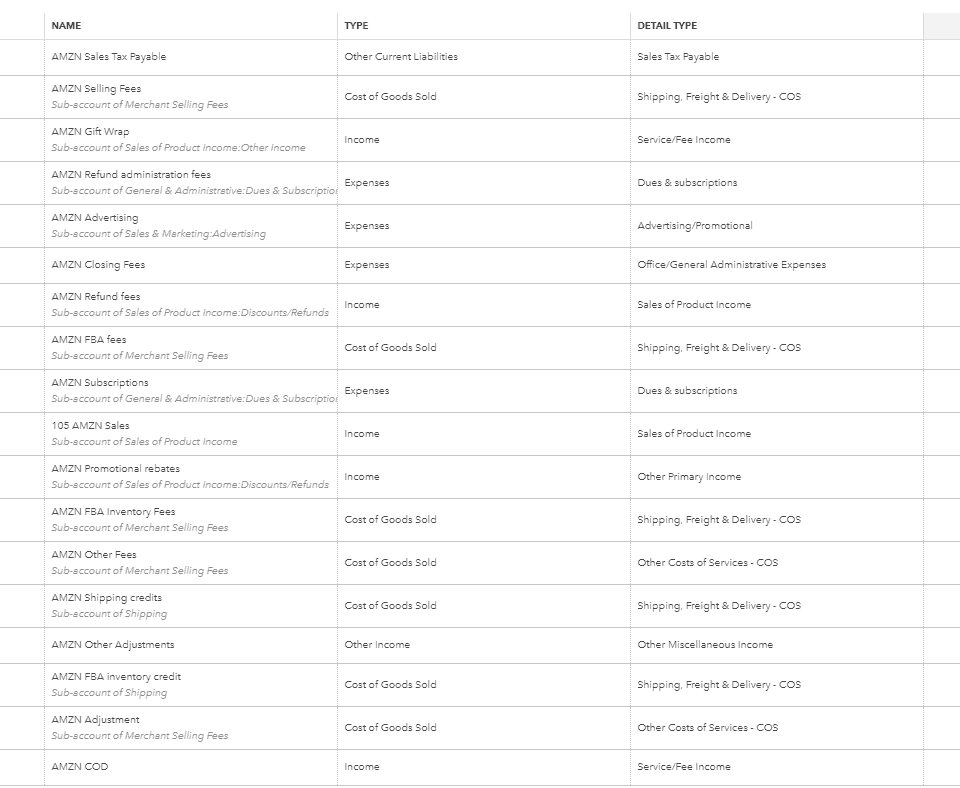
Below is an example of how the mapping screen looks inside Entriwise:

This mapping is then translated into your Quickbooks’ chart of account as follows:
Importing Sales Data into Quickbooks
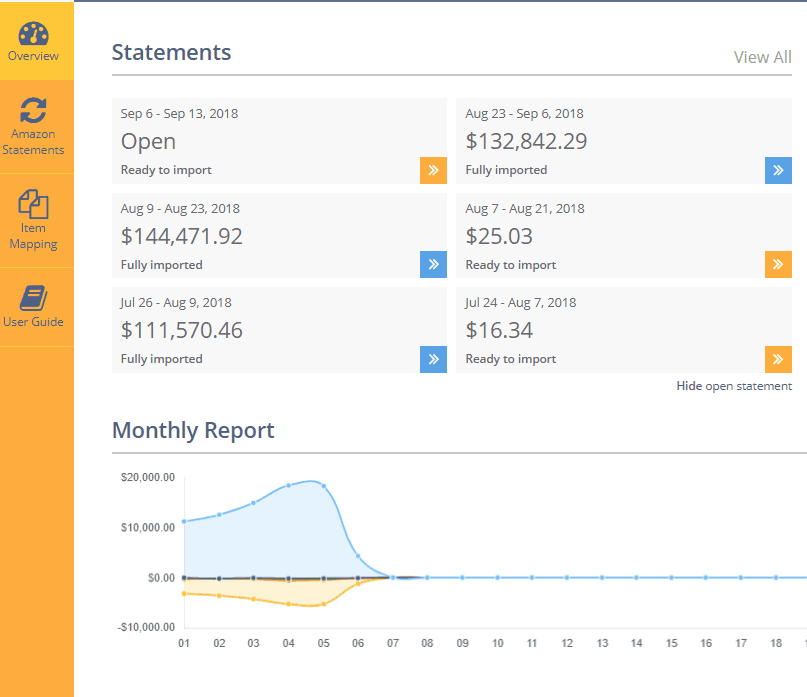
Once you have synced Entriwise with your Quickbooks file, you’ll be ready to import your sales data. To do this, go to the Amazon Statements section of Entriwise, choose the ‘Settlement Period’ that you wish to import, and click Import. At this point, Entriwise will verify the Product & Service Mapping with your Chart of Accounts. Once the mapping is confirmed as accurate, the data will start to import. This might have a few hours depending on the amount of transactions.
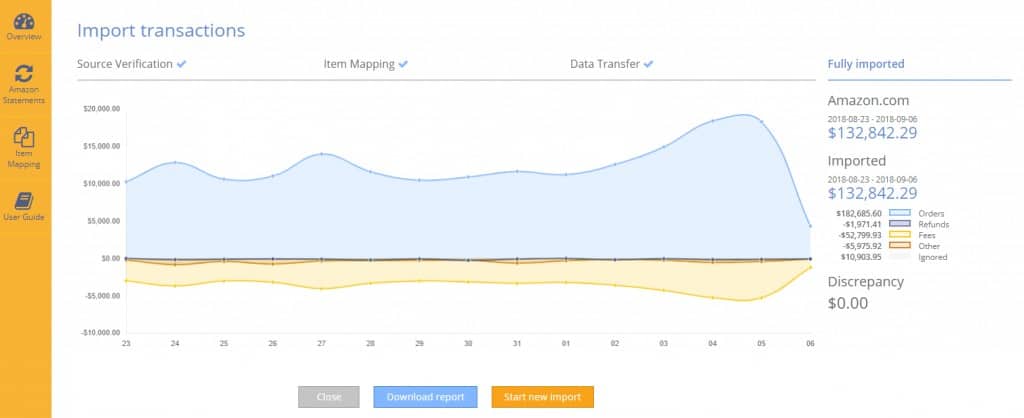
When the import is completed you‘ll see a report similar to the one above.
If there are no discrepancy, then that means that your sales data has been imported into Quickbooks and that the data is ready to be reconciled.
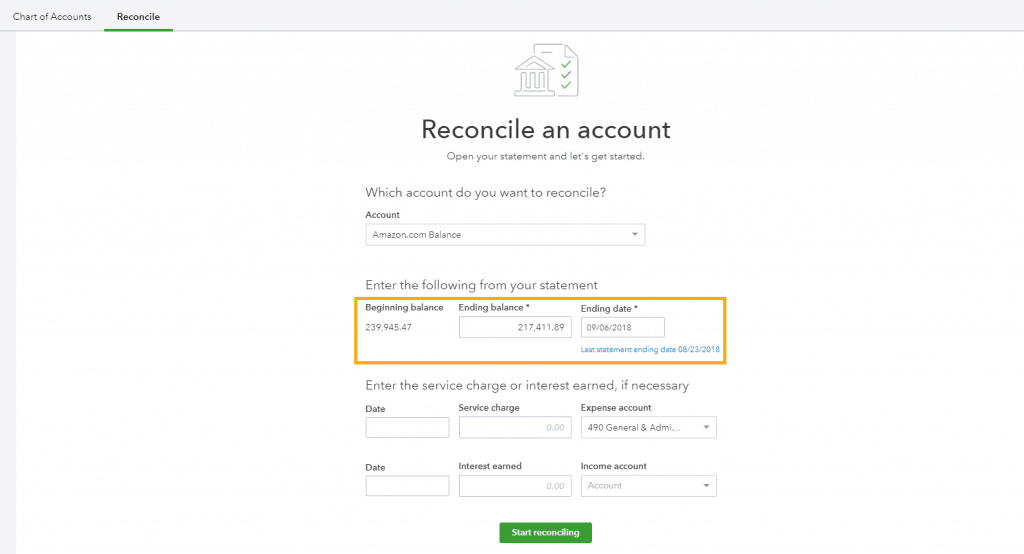
Reconciling Your Sales Data Within Quickbooks
In order to reconcile your sales data within Quickbooks, you’ll need to enter the Ending Balance and Ending Date for the statement period that was just imported.
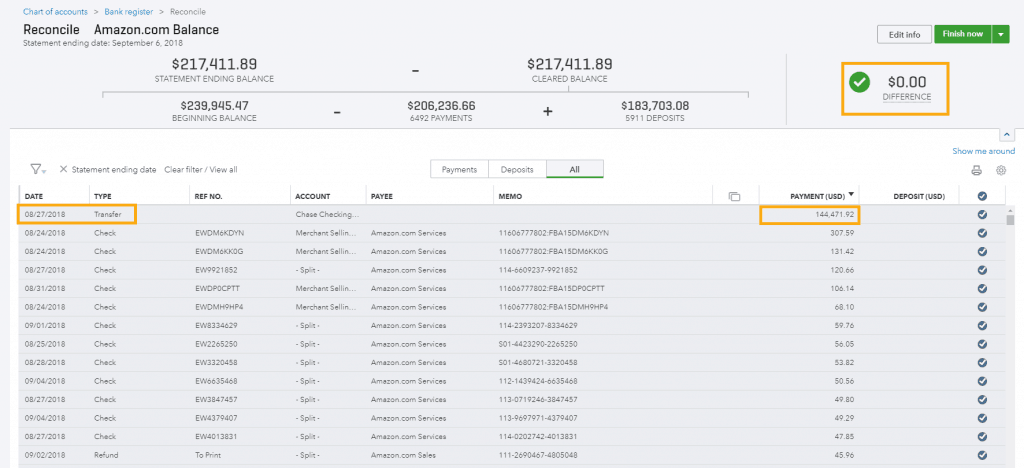
If the import was done correctly, then your reconciliation should be as selecting all of the open transactions, and you should see “$0.00” as the difference remaining.
If there is a difference remaining it is usually due to the transfer amount from the prior statement period and this will need to be entered manually.
In Closing
It’s our hope that the information above has demystified the process of integrated and reconciling your Amazon sales data within Quickbooks. If you have any questions, feel free to reach out, and we’d be happy to assist!
Lanyap Financial is a tech-based accounting and financial services firm that specializes in streamlining their clients’ financial operations through FinTech software and cloud-based applications.